
Tuesday, July 19, 2016
Back to School Chat on Twitter
Here is our list for Route 22's special Back-to-School Chat on Twitter. Check back for more details or use #btschoolchat on Twitter.


Monday, July 18, 2016
Modeling Multiplication and Division with Watermelon Plates
 I live for classroom hacks! I enjoy discovering new ways to deliver math instruction. Recently, I found a fantastic package of watermelon plates at Wal-mart. I was attracted to the seeds in the middle of each plate. The seeds are great for counting in primary grades, but kids can also use them for lessons highlighting the importance of multiplying and dividing.
Items Needed:
Watermelon plates
Counting Cards
Sharpies
Paper or Journal
Pencil
The Hook:
How can watermelons help us learn about multiplication and division?
After passing out plates to students, tell them you need to know how many seeds are "in the watermelons." Next, ask students "How can we find the total number of seeds?" Students can answer this question in journals or discuss possible responses with partners, small groups, or in a whole group format. Based on responses, extend the conversation by asking them to choose the fastest method.

Watermelon Work:
Distribute "counting cards." The cards should indicate the number of seeds students should group together. For example: "Circle groups of 3 seeds." Another option is the "A, B, C, D, E." Assign students groups based on the letter they call in a whole group format,
Recommended groupings: two seeds through seven seeds.
After students group seeds, ask them how the groupings can help them count faster. Students should be able to respond that they can count the number of groups and multiply by the number of seeds in each group. There may be seeds left over. Students can add the remaining seeds to the product. Make sure students write the multiplication expressions in their journals or worksheets. Extend this part of the lesson by allowing students to discuss how and why different groupings resulted in various multiplication expressions. |
| Student asked to group seeds by five. |
Wide Divide:
After students determine the number of watermelon seeds on each plate, discuss how the groupings also represent the inverse of multiplication (division). First, ask students how the groupings model division. Seek input and responses from students. The goal: students realize that the total number of seeds divided by the number of seeds in each group results in the quotient (the number of groupings created with a possible remainder).
Beyond the Plates:
Watermelon is healthy, nutritious, and TASTY! If possible, offer watermelon cubes or slices to bring a little bit of the "real-world" into this delicious summer math lesson.
Happy Hacking!
Monday, July 11, 2016
Error Analysis in Mathematics
 It will happen. Students will make mistakes when solving math inquiries. In the past, these errors were met with red ink and low grades, leaving generations of students feeling as if math was a bottomless pit they could never escape. Now, errors can serve as learning opportunities students can use to master mathematical concepts.
Why error analysis?
Error analysis is the process of reviewing solutions to math inquiries, identifying mistakes, explaining why they were made, and making corrections. For example, if a student completes 20 problems focused on multiplying rational numbers, and two of the answers are incorrect, did the student make calculation errors or does the student have an issue understanding the proper algorithm? Would your response change if the student answers 15 out of 20 incorrectly?
While it is important for educators to understand the types of mistakes students make, there is a crucial element missing. Students also need to learn how to identify and correct mistakes. The most effective types of error analyses focus on 5 common mathematical errors: conceptual, operations, reading comprehension, procedural, and silly (EA CORPS).
Conceptual errors
Conceptual errors arise from the failure to recognize, understand, or connect math ideas and principles. Indicators of conceptual errors include errors based on definitions of math concepts or repeated procedural or calculation errors. A student who identifies a four-sided curved figure as a quadrilateral may not recognize that quadrilaterals are formed by four straight line segments. Conceptual errors are the hardest to address and require planning and consistent practice to overcome.
Operations errors
Operations errors - also called calculation errors - can be a major roadblock to students trying to master mathematics. Addition, subtraction, multiplication, and division are at the core of the subject, and mistakes here can cause major frustrations. Many times, operations errors are minor, and students can prevent them by checking their work and taking additional time when solving problems. Repeated operations errors may indicate issues with conceptual or procedural understanding.
Reading comprehension errors
Some would argue that math has become "reading comprehension with numbers." Indeed, mathematics is a language. Therefore, it should come as no surprise that reading comprehension is a major issue in error analysis. This type of error occurs when a student misreads or misunderstands the text. It can stem from a lack of focus, rushing, or the inability to analyze text. Students understand the basic concept and apply correct procedures. There are also no calculation errors. Review the example below:
There are 5 cars and 3 trucks in the parking lot. Write the ratio of trucks to cars in three different ways.
Jon's response: 5 to 3, 5 : 3, and 5 / 3
Jon's response shows that he understands the concepts of ratios and how to write them. Jon's mistake stems from failing to order the objects being compared based on the prompt. Students can avoid reading comprehension pitfalls by highlight key words, close reading, using context clues, and using graphic organizers.
Procedural errors
Procedural errors are mistakes in processes when solving math problems. Errors include incorrect operations, incorrect algorithms, and incorrect or missing steps. This type of error can manifest when students work with the order of operations, for example. Some students will perform multiplication before division and addition before subtraction despite the order of the operations (left to right). Procedural errors also arise when students learn "shortcuts" before understanding concepts. They rely on shortcuts and fail to develop the conceptual or procedural fluency needed to master concepts.

Silly errors
Silly errors are not really silly, but they are the easiest types of error to fix. Many silly error excuses are easy to identify:
"I ran out of time."
"I thought the answer was right."
"I changed my answer."
"I didn't pay attention."
There are two important ways students can combat silly errors: focus and confidence. Focusing on problems, one at a time, can alleviate problems caused by failing to pay attention. Practice builds confidence, which is needed when nervous guts tell students to change the answers, but clear minds know the first answer is correct.
Join the EA CORP!

Click here for student error analysis guide.
Join the conversation on Twitter using #eaCORP.
Further reading:
Simple Activities can Help Reveal Students' Issues with Math Concepts
Is Reading Comprehension the Real Problem with Math?
Sunday, April 17, 2016
Test Prep Hack: Integer Activity Using Cups
 It is test prep season, and teachers and students everywhere are gearing up for those BIG tests by using questions and activities. Studies have shown that using a variety of methods for test prep keep students engaged and prevent them from reaching a plateau before test day. Since the stakes are high, alleviating stress and anxiety by incorporating games in a test prep environment is important.
Of course, games are fun, and saving money creating those games makes it even more fun. What if you could use 6 cups and 1 permanent marker to create an engaging lesson? What if I told you it is possible? (*Are you smiling yet?)
Cups Full of Integers
Cups Full of Integers is an activity I created to provide a challenge for students learning about comparing and ordering integers. It is simple to create. Basically, you stack 5 cups and then write integers in order the cups. You can choose greatest to least or least to greatest. Use the sixth cup as a guide to make sure your numbers are aligned.

Once you separate the cups, you have created a puzzler that, at first glance, seems simple to solve. Trust me, it is not as easy as it looks to order the cups correctly if you choose a good set of integers. Cups Full of Integers can be used as a station activity for test prep review. Consider making more than one set for the stations so that students can work together to solve the puzzler. Remind them to separate the cups and shuffle them so that the next group of students will have the same experience with the challenge.
This is a great activity for less than 50 cents!!!
If you are pressed for time, I created a version of the activity with a set of numbers to use and recording sheets. Click on the image for details.

Monday, February 15, 2016
Only Mice Like Useless Socks: The Power of Mnemonics

It's no secret that mnemonics can help people remember steps and processes in mathematics and other subjects. Many people have heard (and used) the mnemonics for the order of operations: PEMDAS and Please Excuse My Dear Aunt Sally. I've personally witnessed the power of mnemonics and their usefulness. They help make learning "sticky" and help calm students during testing situations.
Have your students had trouble with interquartile range? The concept was added to our sixth grade standards last year. Interquartile range is quite different from the simplicity of dot plots and bar graphs. It requires students to find the median of a set of data, the median of the lower half of the data, and the median of the upper half of the data. When I first introduced the concept to students, they had that classic "what?" look. I had to think of a way to help students remember how to find interquartile range.
I listed the steps for finding interquartile range, and the idea of mice and socks formed in my mind. A short time later, I wrote down the mnemonic "Only Mice Like Useless Socks."
Order the data from least to greatest
find the Median of the data
find the median of the Lower half of the data (Q1)
find the median of the Upper half of the data (Q3)
Subtract Q1 from Q3
The quirkiness of the mnemonic is perfect for middle school students. To "hook" them in, ask them how they think mice and socks can help them remember interquartile range. The responses you get will probably be hilarious, but the question and the responses add to the "stickiness" of the lesson. The mnemonic transformed a normally tricky lesson into one where students have a little fun. Maybe it will work for you as well.
Click here to download a copy of the worksheet I use to introduce interquartile range. It's available for FREE until Saturday, February 20, 2016.
Have a great week!!!
Tuesday, February 9, 2016
Classroom Hack: Think Outside the Box Plot
 Learning is Love...and I love classroom hacks! During a recent trip to the dollar store, I picked up some great finds for Valentine's Day. I've been thinking about how to help students better understand box plots and interquartile range. I like students to explore various ways to make learning "sticky." Once I found a bag of foam heart-shaped stickers, I hoped I could create an activity that would make box plots sticky for students.
I always like to start off with a crazy question. For this lesson, I may ask students, "How can hearts help us learn about box plots?" At first glance, there is no obvious answer (one student did mention that we could display the data for heartbeats:. ;-)
 |
| 100 Hearts for $1. What a deal! |

Students will use the task cards to determine the median, first and third quartiles, and the upper and lower extremes. They will create a number line with the appropriate scale and intervals. Next, they will write the labels of the five summaries on the hearts. Now, they can construct their box plot using the stickers and the string.

What's great about this activity is that it's quick and simple. Plus, kids will have a little bit of fun while learning about or review box plots. Win-win for $1 plus tax. We can all love that!!!
Sunday, January 31, 2016
Learning to Love Hacks: Groundhog Day
 I'm celebrating "Learning is Love" this week with my fellow Texas teachers Lauren of Leaf and STEM Learning and Randi of Teaching in an Organized Mess. We want to share why we love learning, and we hope our love will bring inspiration to educators as we close out January 2016.
Click Here to get this Groundhog Day Freebie on TPT!
If you have followed my blog long enough, you know that I'm addicted to shopping at dollar stores and finding materials that can spark a love of learning in students. My recent trip was no different; I found some plates and tape. I just had to find a groundhog. And I knew I couldn't dig for it. Instead, I found a wonderful set of groundhog images from Educlips on TPT.
My mission (and the mission of my students) is to create a sundial and take it outside to see if the groundhog can see its shadow. It's a great activity for elementary grades, but middle school students can benefit from it as well.
What shape is it?
First, students should cut the groundhog to size. I ask students to identify the shape of the cutout. Most students will immediately answer triangle. Prepare to ask them again, but tell them you want to know the shape of the entire cutout.
 |
| Hint: It's a trapezoid. :-) |
Find the area
Yep, break out those rulers. Once students identify the shape of the cutout, they'll need to find its area. What looks like a print out, a plate, and some tape is turning into a nice, engaging lesson. To facilitate this part of the lesson, students round measurements to the nearest half-inch (or half-centimeter).
Fold it up
After students find the area, I ask them to fold the shape along the dotted line. Now, there are two shapes. Students must identify them and find the area of those two shapes. Next, they'll reflect on the area of the first shape and the area of the two shapes.
Finally, the sundial
Never one to lose out on a chance to review, I'll ask students to identify the shape of the plate before marking the center. Students should place the plate face down. If you are working on circumference and area of circles in your classes, its a great time for students to review those concepts.
- After marking the center of the plate, students should write the numbers for their "clock" around the perimeter of the plate.
- Students can attach the groundhog to the center of the plate using tape. The groundhog should line up with the 12 and the 6.
- Take the plates outside (or to a well-lit room). Will the groundhog see its shadow?
- If you have an outside area or room that receives sunlight for an extended period of time, set of the groundhog sundial and observe how the shadow changes over time.
 |
| The plate before attaching groundhog |
Hopefully, you can use this quick and fun activity in your classroom this Tuesday. If you're looking for other blogs in our Learning to Love series, please check out Lauren's blog or Randi's blog.
Want to win a $25 TPT gift card? Click here to find out how!!!
What FREEBIES: Click here!
Tell the world what you love about learning on Twitter: #learningislove
Saturday, January 30, 2016
TPT "Learning is Love" Crave - Win a $25 Gift Card
Learning is Love. Teaching is Heart. If you're like me, you love to teach, but sometimes the budget we need to instill a love of learning in our students is tight. Three Texas Teachers have joined together to help lighten the budget burden with a chance to win a TPT Gift Card!
Click Here for Your Chance to Win!
Monday, January 25, 2016
A Tale of Two Homeworks
 "It was the best of times; it was the worst of times." That classic line from Charles Dickens' A Tale of Two Cities pretty much sums up my feelings about homework. I believe that students need to complete work outside of the classroom to prepare for the rigors of college and professional work life, but there are times when the homework return rate is abysmal. I've often asked myself: "What's the point of assigning homework when only a small percentage of students turn it in?" I've personally witnessed kids copying a classmate's work right before class or scribbling as hard as they can to get a little credit. I've been given every excuse (from kids and parents) and have tried almost trick in my toolbox. Some teachers at my school have given up on homework for this very reason. It's definitely the "worst of times."
I've taken some time to review my homework success rates. There are several approaches I take that has led to more success.
Get 'Em Moving at Home
We have all used them...that worksheet with column after column of problems. I can totally understand how this type of homework can lead to extreme boredom at home. I think kids benefit when they can use concepts we learn during class to explore the real world of math. For example, for part of our geometry unit, students learn about the volume of rectangular prisms. I do have a traditional homework sheet available, but I also give students the opportunity to explore volume at home by measuring a household object and finding the volume. Guess which one the students prefer?
 |
| Traditional Homework |
 |
| Get 'Em Moving Homework |
Flip the Script
Flipping the classroom has definitely helped students complete work outside of the classroom. I started posting videos on my online classroom (I use Quia, but your district may have Schoology, Edmodo, or Moodle). Instead of doing math problems at home, students work on note-taking skills. I have two particular formats we use for notes. We then focus on math problems during class. Some days, I give students who don't watch the videos at home the opportunity to complete them during class while other students are working in groups.
Nothing New, Home for Review
In the past, the homework I assigned focused on the topic we covered in class that day. I realized that one of the reasons students didn't complete the work is because they were stuck on a problem and gave up or decided to wait and ask me how to approach the problem during the next class period. To address this issue, I started assigning spiral review homework. It focuses on topics we've already covered with varying degrees of difficulty. I saw homework completion rates increase with this approach.
Ten or Less is Best
I've taken some heat for this approach. Generally, I assign ten or fewer problems for homework. There are times it increases to 15 or so, but not very often. I've found that if students "get it," ten problems helps them get the review or reinforcement they need to be successful in my math classes. If they get ten problems wrong, they're going to get 20 problems wrong. There is no need to have them complete problem after problem if I need to work with them to make sure they understand a particular math concept.
Paperless Homework
Google forms and Quia have definitely helped me save a ton of paper! I post the problems online and students submit it. Simple, yet effective. It has the added benefit of allowing me to see when students are completing their homework. What I love most about paperless homework is that it allows me to give students the opportunity to fix problems before they submit it for a final grade. I often ask them, "Why not go for 100% mastery?"
Variety is the Spice of Life
Instead of assigning one type of homework all the time, I use all of these approaches to "keep it fresh." I'm also researching more ways to get students to enhance their learning outside of the classroom. Do you have an innovative way to get kids to complete homework? I'd love to read about your tips and tricks.
My challenge to you this week: try a different approach to homework and see if it makes a difference.
Monday, January 11, 2016
What's the Connection between Fashion and Math?
 I love asking my students questions such as the one in the title. The answer can be found on a wonderful website called Get the Math. Don't just get the math - grab it! Once you start using the materials from this wonderful website, you will understand why it is one of my favorites. Oh, maybe you're wondering where the link is to the awesome goodness that is Get the Math...
Get the Math offers excellent representations of using math in the real world. As a true fan of Project Runway, the lesson with Chloe Dao - who won season two - is one of my go to lessons from this website. Her lesson focuses on how fashion designers use math to design clothing for different sizes. It starts with an introductory video about Dao and ends with a challenge. Students have to calculate the costs of manufacturing a design that will have a 220% markup. To plan for this lesson, I picked up a few inexpensive t-shirts from a discount retailer. I rearranged the desks so students could work in groups to complete the challenge. The kids had a lot of fun and learned at the same time.
To extend the lesson, students could design their own simple t-shirts and set a price for them. They would have to research the cost of the t-shirt as well the cost for printing images or adding embellishments. Their mark-up would have to be a certain percentage. In my classes, they would meet in small groups with their finished products. Each group would present one t-shirt to display and explain why they chose it.
I love Get the Math because it offers real-world math connections along with inspiration for project-based learning. This is a win-win in my view. The diversity of the lessons gives teachers the opportunity to reach the interest levels of all students. Hopefully, you'll find it useful as well.
Wednesday, January 6, 2016
Classroom Hack: Student-made Rational Number Cubes
 If you're like me, you love using number cubes and dice in the classroom. They are versatile tools perfect for a variety of math games and enrichment. There are times when I find the number cubes limiting because the cubes that include fractions and decimals are basic. They include unit fractions and decimals to the tenths place. I've been searching everywhere for cubes with different types of rational numbers. My search ended with a trip to my favorite dollar store!
There, I found packages of blank foam counting blocks. Each package contains 50 blocks. The price - $1.00. I grabbed a couple of packages for my classes and rejoiced in the knowledge that I would soon have the best number cubes ever!

First, I separated the number cubes and placed sets of them in small cups. The cubes come in colors of red, blue, green, and orange.

Although students normally carry Sharpies, I also placed them on the desks for each group. I gave the students simple instructions:
(1) Make a list of 6 rational numbers in your spirals. The rational numbers must include at least two negative numbers, 1 integer, 1 decimal, 1 fraction, and 1 percent.
(2) Review your numbers with your group members to make sure none of you have the same rational numbers. Make modifications if necessary.
(3) Select one number cube and one Sharpie (fine point). Write your numbers on the six sides of the number cube.

Within two days, I had 150 number cubes with a wide variety of rational numbers. Not only did my students practice the important skill of generating rational numbers, but there was also 100% engagement! So, how do we use the number cubes?
- Comparing rational numbers: roll two cubes and compare
- Ordering rational numbers: roll four cubes and order the numbers from least to greatest or greatest to least
- Rational number operations
- Graphing rational numbers on number lines
Saturday, December 26, 2015
Teachers, Your Giftwrap May be Hiding a Secret...
 It's the Sunday after Christmas, and if you're like me, you're already searching for some great clearance deals. I'm on the hunt for wrapping paper, and some of the stores I visited are offering 50-75% off this holiday staple. Wrapping paper - also called giftwrap - is great for working on activities involving volume and surface area. So, I stock up when I can. Dollar stores always have deals on giftwrap. There's another reason I like giftwrap - it is "hidden" on the side without all the bright colors and playful prints. If you have a roll of giftwrap, you may have a cost-cutting treasure on the opposite side.
Normally, a roll of coordinate grid paper costs $30 or more. For $1.00, budget-minded teachers can use the back side of giftwrap for the grids. Not all giftwrap has grids, but all of the paper I've purchased from Dollar Tree has had them. If offers an excellent alternative to basic black and white grid paper - at a fraction of the cost!
 |
| Yellow Grids Lines on Giftwrap |
Kids Love Color
Even though kids will use the back side of the paper, they are excited to use educational materials that are unique and colorful. You'll never go wrong with samples of giftwrap. If you choose giftwrap with grids, you may notice that some grid lines are darker than others, but they are noticeable.
Learning about the Cartesian Coordinate system
Cut out squares of giftwrap and distribute to students. Review the Cartesian Coordinate system with students and allow them to "take notes" on the paper. Once their notes are finished, they can fold up the sides to complete the activity.
 |
| Cartesian on Giftwrap |
Mystery Pictures and Scale Drawings
My favorite activities to use with wrapping paper grids are mystery pictures and scale drawings. Students work in pairs. One student receives standard grid paper and his or her partner receives a section of giftwrap. Students complete the mystery pictures and compare the pictures to find the scale. Students can also work individually to scale pictures.
 |
| One big, one small, and a great lesson! |
Saturday, December 12, 2015
Favs for the Holidays
The holiday break is almost here, and Angela from Southern Fried Teachin' is asking educators about their favorite things. I love hooting about favs, so I thought I'd join in on the fun!


1. Favorite Holiday Song: Christmas Canon from Trans-Siberian Orchestra. It always gets me in the spirit.
2. Favorite Holiday Guilty pleasure food: my mother's creamy pork chops!
3. Favorite Holiday Tradition: Getting together with Family
4. Favorite Holiday Book: A Christmas Carol
5. Favorite Holiday Act of Kindness: Giving presents to those who need assistance.
6. Favorite Holiday Memory: There's too many; I can't choose just one!
7. Favorite Holiday Childhood Gift: That's easy; my first computer.
8. Favorite Holiday Craft: Gingerbread houses
9. Favorite Holiday Movie: Home Alone
10. Favorite Place to Shop for Holiday Gifts: Amazon. I'm wearing out my Prime membership!
11. What I want Santa to bring me: A new computer and a 3D printer.
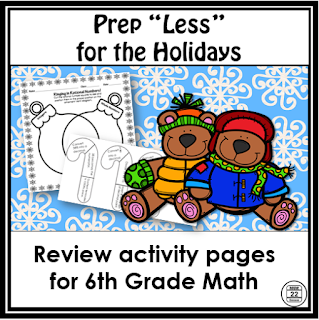
12. Favorite Holiday Product: Prep-Less for the Holidays with Holiday Math for 6th Grade!
Wednesday, December 9, 2015
Classroom Hack: Tic Tac Penguin

I love, love, love dollar stores. I've found my best classroom hacks in dollar stores, and now that I'm preparing for the holidays, it's good to know I can rely on them for excellent ideas for activities.
Just $1 (plus tax) was enough to pick up this tic-tac-toe game with a penguin. My goal: to make a review activity for students.

First, I inserted labels in the spaces. Using labels allows anyone to change the format of the game at anytime. Whenever it's time to make a change, just remove the old labels and insert new labels!

Next, I selected a set of 9 task cards on topics students need to review. Task cards with QR Codes work well because they allow students to self-check their answers while working. I used triangle inequality task cards for this game, but any task cards will work. Instead of two students playing tic-tac-doe with another student as scorekeeper, only two students are needed when using QR codes. That means more engagement. Win, Win for everyone! I also downloaded a free snowman spinner from Creative Clips and added numbers. The game was ready for a math center!

Playing "Tic-Tac-Penguin" is as simple as the traditional game! Students use the spinner to determine which card to use. If the calculate the correct answer, they can place an "x" or an "o" on the corresponding number on the tic-tac-toe board. A student will lose a turn if he or she spins a number of a card that has already been solved.
Kids will LOVE this alternative to traditional review as we all prepare for the holiday break. It all started with $1!!!
Thursday, October 29, 2015
Words We Know, Words to Grow!
 I've been thinking of a new way to present information on my word walls. I really want my word walls to be interactive, a place where students can visit and actively learn important terms and meanings. So, I tried "Words We Know, Words To Grow." When I introduce new terms to my students, I give them sticky notes and ask them to list the words they know on one sticky note and words they need to learn (words to grow) on the other sticky note. Then, they post them on the word wall. This allows me to focus on the words to grow as we implement the lesson. As students learn the words, they can return to the word wall and move their sticky notes. It has worked so far; I'm hoping to incorporate more interactive word wall ideas soon!
Tuesday, October 27, 2015
Last-Minute Lessons: Halloween Math with Napkins
 |
| This is how the napkin looks folded open. |
Quick Lesson for Middle Grades
 |
| Ratios for 6th grade. |
Pre-K, K, and First
 |
| Kids can circle and count. |
Second Grade – Fifth Grade
 |
| Consider using note cards for a quick check or exit ticket. |
These napkins meet my standards for quick lessons that can
be fun, relevant, and engaging. Plus, they only cost $1.00!
Sunday, September 6, 2015
The Art of D.I.A. {Doing it Alone} in the Classroom

 Last
year, I faced a classroom conundrum. I was losing the attention of my students.
I didn’t know how it happened, or even when it started. In order to
maintain the successful classroom I strived so hard to create, I had to stop
the momentum of listlessness. I could have chosen to pick up a book, read a few
blogs, or even watch a couple of videos. They are all very effective tools on
addressing issues in the classroom. This time, however, I decided to go to the
source – my students.
One
day, I asked my students to list how to improve their math class experience. I
put a box in the back of the classroom and gave students 10 minutes to respond.
They responded honestly, and I appreciated that they trusted me enough not to
fear truthfulness. The gist of the most popular choice was “I want to work by
myself when I first start to learn something. We work in groups too much.” This
was surprising. I love groups and math stations and I thought the students did
as well. After discussing the responses with students, I learned that they also
loved stations, but felt like they would get more out of them after they were
more comfortable with the math concepts.
The art
of doing it alone seems scary; we need to move through material and we don’t
want anything to go wrong with our lessons. I’ve always stressed to students
that it is okay to fail as long as they thought of it as an opportunity to
improve. Now, it was time for me to apply that philosophy to my classroom.
The Art
of DIA meant that after my lecture and some direct instruction, I gave students
a set of problems or an individual activity and stepped back as they went to
work. There is no talking during DIA time, and surprisingly, the majority of
students follow this rule. I monitor from a distance. I don’t walk up
to their desks, ask them what they are doing, or even ask them to explain what
they have learned. I don’t interfere with their personal learning space. Student know they can come to my table if they have questions.
Are you
ready to practice the Art of DIA in your classroom?
Set the expectations
The first step to a successful DIA experience is communicating the expectations during this time:
- How long will DIA sessions last? (I recommend 20 minutes or less)
- How many days per week will students participate in DIA sessions?
- How will students be able to seek help if they get stuck?
- Will students have access to online learning materials while working alone?
- Will students be able to listen to music with headphones?
- What are consequences for students not meeting expectations?
Provide access to learning materials
All
students learn differently. Some students learn best while modeling and working
with manipulatives (kinesthetic) and others grasp material by watching videos
(auditory and visual). Consider setting up areas in the room where students
have access to these types of materials; it gives them the opportunity to take
control of their learning.
Become an active observer
DIA sessions are great times to observe how students learn. You will begin to notice when students are struggling with material and when they mastering it. Make sure students understand that they CAN ask for assistance during DIA time.
All
students should engage in learning opportunities during DIA time. Invariably,
some students will finish early. Provide these students opportunities to work
on extension activities such as task cards or challenge problems.
The Art
of DIA has the potential to transform your classroom and improve student
outcomes.
Sunday, August 30, 2015
Corn in the Classroom? Yeah, it's crazy, but effective.

Isn’t it interesting how inspiration can come from the
simplest things? Several years ago, I was at the grocery store when it hit me…the
corn. At first, I didn’t understand why something I’m familiar with totally
occupied my mind and my shopping experience. It wasn’t too long before I
figured it out; I found a new way to introduce rational numbers to my students.
I selected seven ears of corn (6 for my classes and 1 for practice) and planned
for a great day of learning.
Okay, I have to admit my kids thought I was a little
crazy when they walked into the room and saw a plastic covered desk in the
front of the classroom with corn on top of it. I had even gone as far as to
borrow protective eyewear from one of the science teachers. When my students
settled down, I held up a piece of corn and asked them to think about the
relationship between corn and rational numbers.
The majority of students focused on the weight of corn
and the cost. I was happy with their thinking and their discussion, but I was
going in a different direction. I held up the ear of corn and told them to
think about it as a whole number. While I’m certain some of my students wanted
to get the counselor and check on my well-being, they stayed in their seats. We
discussed whole numbers and examples of whole numbers. Then, I took out the
knife.

Eyes widened as I chopped the corn into four pieces. I held up one of the sliced sections and asked, “If an ear of corn represents a whole number, what do these sections represent?”

This time, the kids were ready! We talked about how the
four parts made up the whole. Yep, those were the fractions. Recognition - and
a little bit of excitement - began to fill the room. I knew I had hooked them. Before
I could finish revealing those precious little kernels, hands shot up because
my students knew the question I was going to ask and the answer to that
question.
Yes, those kernels represent decimals. 
In some classes, we even discussed what the silk could represent. In my own humble opinion, silk is totally irrational (those of you who have shucked corn may understand what I mean). Anyway, corn became a successful theme for my rational numbers unit. So successful, in fact, that I’ve used it ever since. I think of it as a “sticky” lesson because the concept sticks with students based on the way it is delivered.
There are many unconventional ways to enhance student
learning, and this is one of my favorites. What are some unconventional ways
you teach rational numbers?
Read my previous blog post about creating review posters
for more information about using corn in the classroom: http://route22edu.blogspot.com/2015/04/creating-posters-for-reviewing-concepts.html
Friday, August 28, 2015
200 Follower Giveaway!
I'm celebrating 200 followers at Teachers Pay Teachers by giving away $20 in TPT gift cards! Sign up to win beginning August 30, 2015. No purchase necessary! Visit my Facebook page at https://www.facebook.com/route22edu at click on the "giveaway" tab to enter!!!
Friday, June 12, 2015
Student Loans Provide Interesting Topic for Math Students
 As a Texas math teacher, I’ve just implemented a series of
new math standards in my classrooms. One critical part of the new standards is
personal financial literacy. The Texas legislature has decided that students
need to be aware of the impact financial knowledge and decisions can make on
their lives, and I wholeheartedly agree. One of the standards requires sixth
grade students to “explain various methods to pay for college, including
through…student loans” (TEKS 6.14G, 2012). In our lessons, we explored the
costs to attend various colleges and what could happen if students decided to
take out student loans. I also told them my own student loan story.
My parents always stressed that “I would never have to pay
for a higher education,” if I kept my grades up. I worked hard and earned
partial scholarships in undergraduate and graduate school, but I still decided
to take out students loans to cover the rest of my college expenses. I made
sure I was an informed borrower, even trying to pay the interest that began to
accrue while I was still in school. Once I graduated and began working in the “real
world,” it was time to pay back the loans. I struggled a bit at first, but
found a balance that worked. When I changed careers, the salary I made barely
covered my living expenses and loan payments. I began what I like to call “the
student loan dance.” I moved through a series of deferments and forbearances
and finally ended up on an income-based plan that has given me a sense of peace.
One of my students asked what would happen if “I decided not
to pay [my student loans].” I explained the concepts of default, lawsuits, and
garnishment. In Texas, defaulting on a student loan would result in losing my
educator’s license. I’m sure many other states have similar measures.
Ultimately, I told my students that when I decided to get student loans, I was
taking out a mortgage on myself – and that’s not a bad thing. My personal “mortgage”
gave me the opportunity to get a great education and impact the lives of
hundreds of students over the years. And, just as I work hard to keep a roof
over my head, I work hard to make sure that one day, I will make that last
student loan payment. One day…
A quick lesson in student loans:
- Allow students to research the cost to attend college for four years
- If you have access to computers or tablets,
direct students to one of the online student loan calculators. Bankrate.com has
a good one: http://www.bankrate.com/calculators/college-planning/loan-calculator.aspx
- After students find their potential repayment
amounts, have them search for their potential annual salaries based on their
future careers. I totally rely on the United States Bureau of Labor
Statistics: http://www.bls.gov/oes/current/oes_nat.htm
- Students should then calculate how much of their
potential salaries will be used on student loan payments.
- In a writing prompt, ask students if the amount
of the loans and their potential salaries will impact their decisions on where
they want to attend college.
Subscribe to:
Posts (Atom)